The Forge (Environment Setup)
This lesson is available in multiple formats. The core lesson is the same, so choose the format that fits your context right now.
📊 Prefer slides? Switch to the Slides tab above.
Preparing your local laboratory for professional development.
1. The Mission
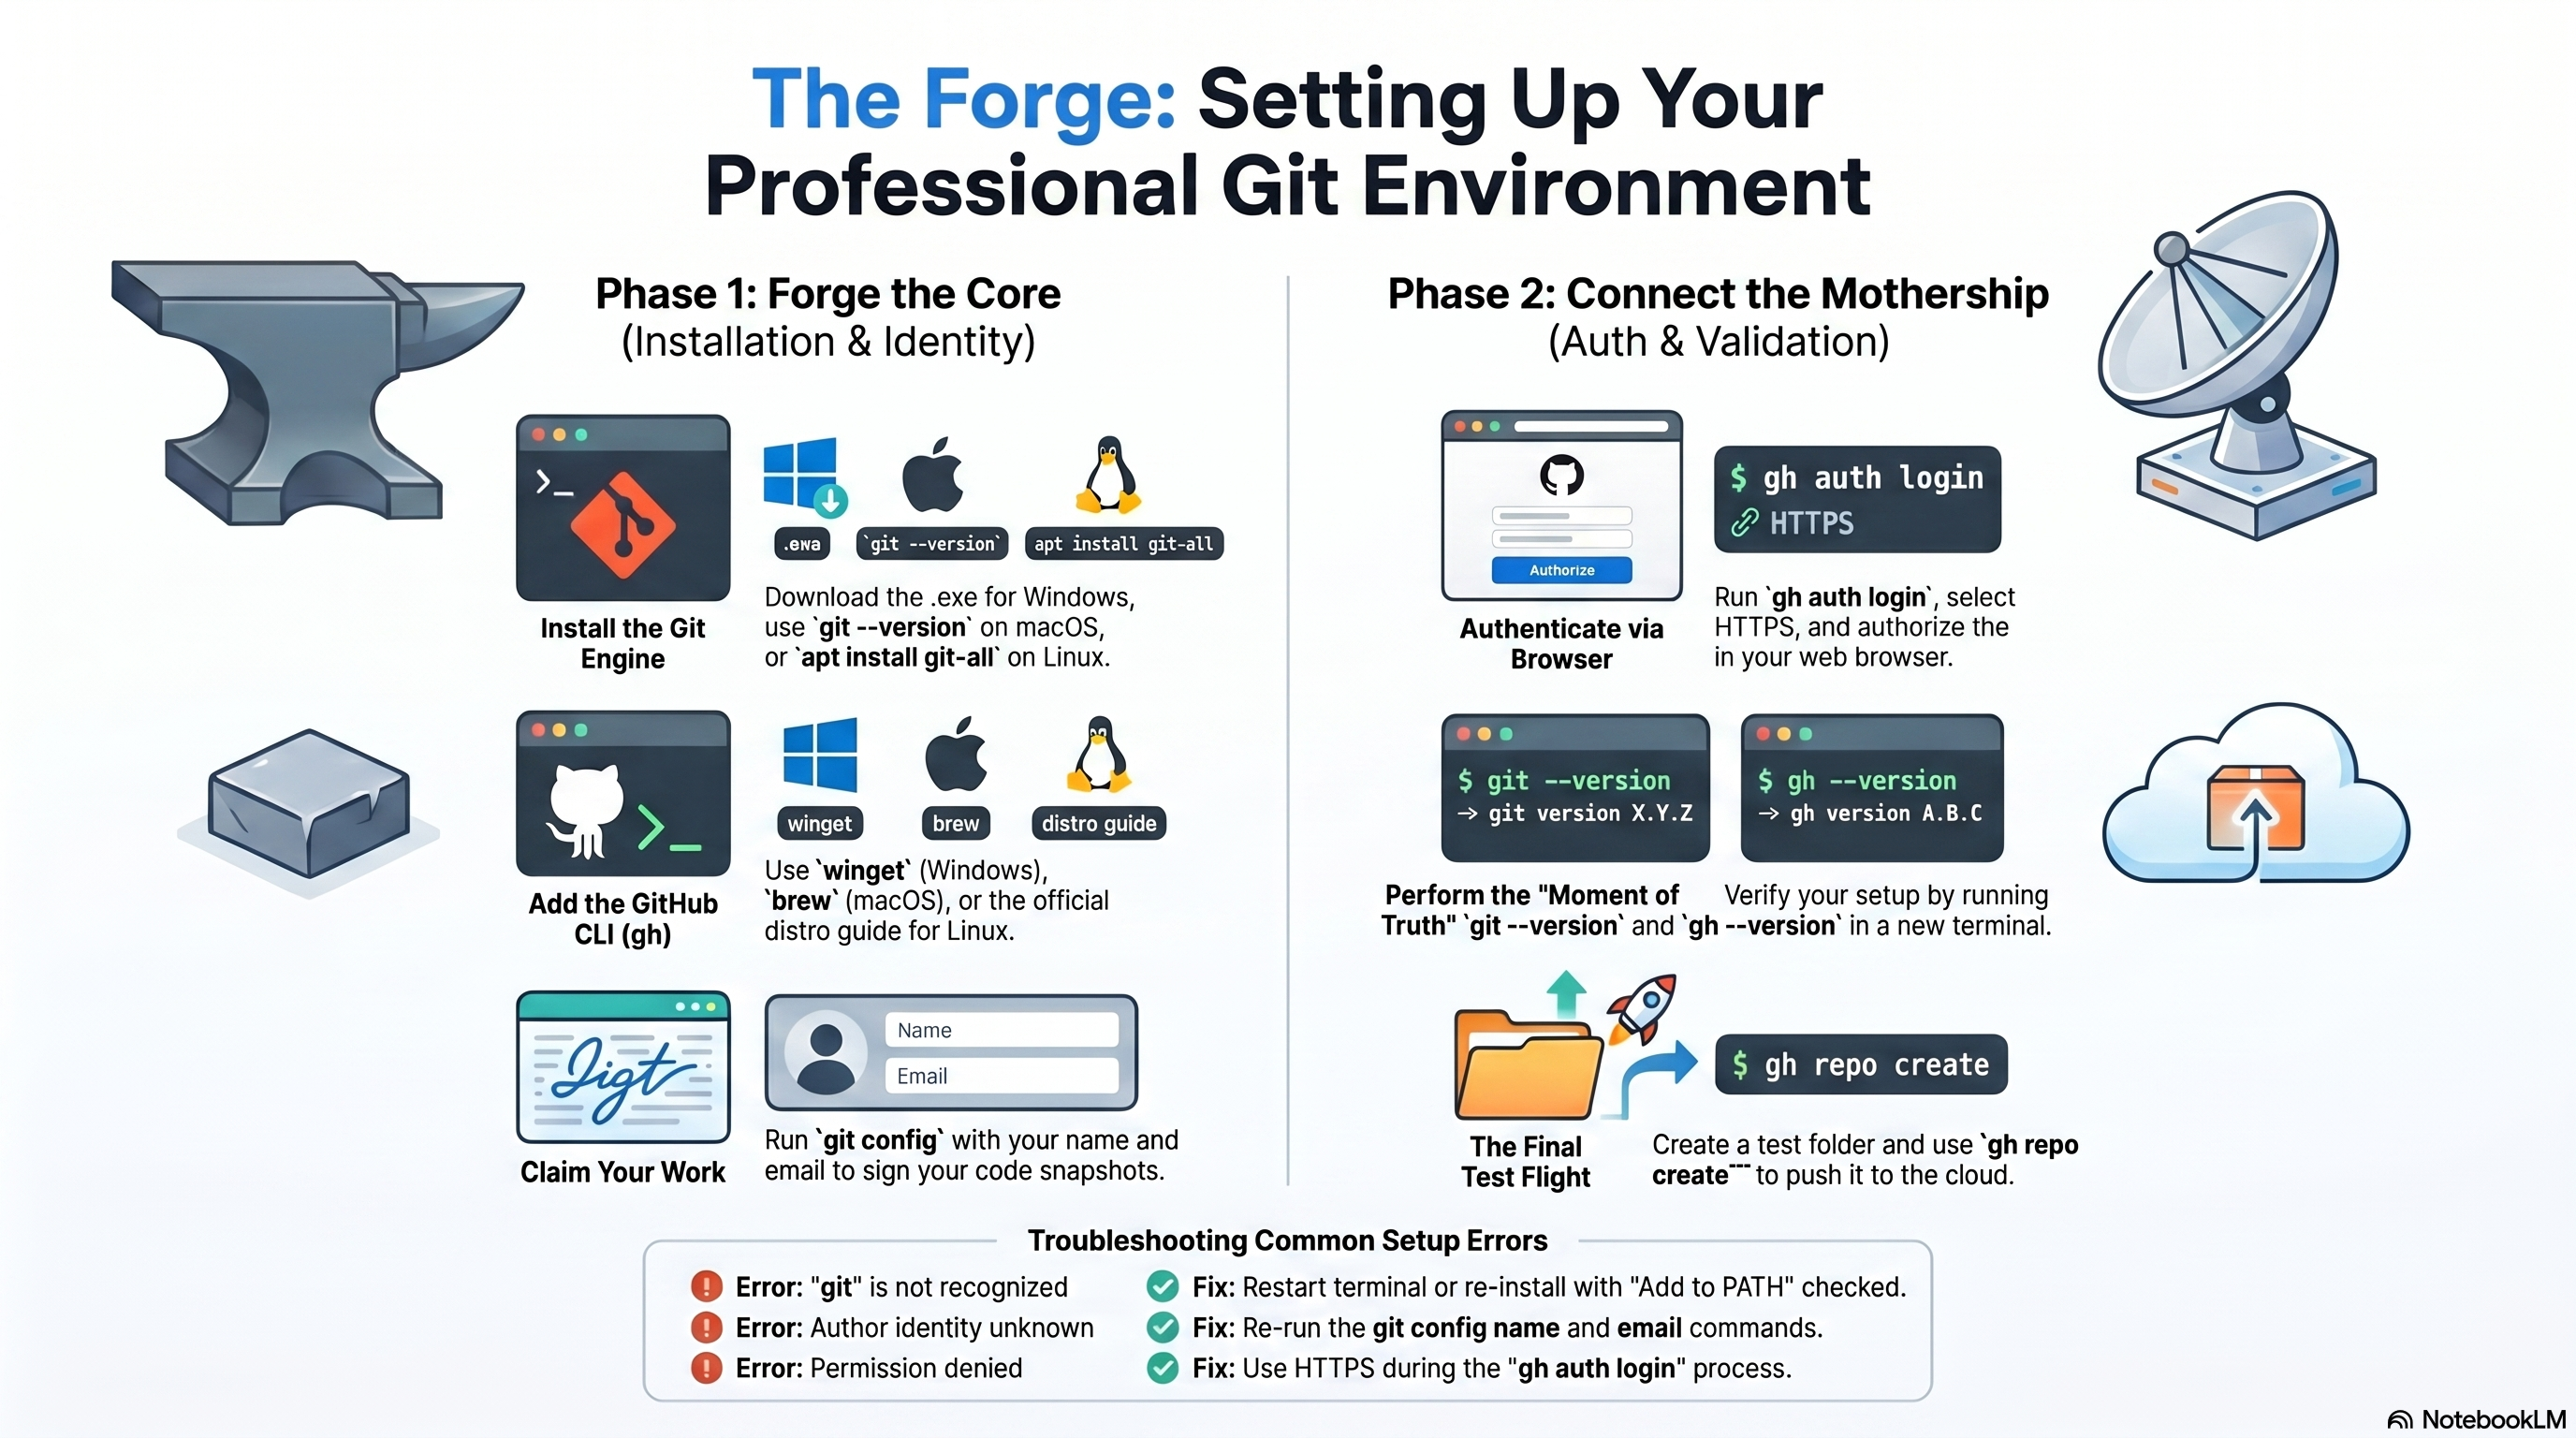
Before we can write code or manage "Parallel Universes," your computer needs to speak the language of Git. In this lesson, you will install the core engine and the professional interface that power the rest of the course.
2. Installing Git (The Core Engine)
Git is the version control system that runs locally on your machine.
Windows
- Download: Go to git-scm.com.
- Install: Run the
.exefile. - The "Next" Rule: Keep clicking Next for all default options. They are perfectly optimized for beginners.
- Tool: This installs Git Bash, the terminal you will use for all future lessons.
macOS
- The Easy Way: Open your Terminal.
- Command: Type
git --versionand press Enter. - Prompt: If Git is not installed, a popup will ask whether you want to install command line developer tools. Click Install.
Linux (Ubuntu/Debian)
Open your terminal and run:
sudo apt update
sudo apt install git-all
3. Installing GitHub CLI (The Pro Interface)
The GitHub CLI (gh) allows you to manage online repositories without leaving your terminal.
| Platform | Command / Action |
|---|---|
| Windows | Open CMD or PowerShell and run winget install --id GitHub.cli |
| macOS | Use Homebrew: brew install gh |
| Linux | Follow the official Linux install guide for your specific distro. |
4. The Moment of Truth (Verification)
Close your current terminal and open a new one. On Windows, use Git Bash. Then run:
git --version
gh --version
Success looks like this: You should see version numbers such as git version 2.x.x and gh version 2.x.x. If you see command not found, go back to the installation steps.
5. Connecting to the Mothership (Authentication)
Now link your computer to your GitHub account by running:
gh auth login- What account?
GitHub.com - Protocol?
HTTPS - Authenticate?
Login with your browser - Action: A browser window will open. Click Authorize and enter your GitHub password if asked.
6. Final Configuration
Tell Git who you are so your commits have your name on them:
git config --global user.name "Your Name"
git config --global user.email "your-email@example.com"
7. The Final Test Flight (Verification Drill)
Do not stop at version numbers. Perform a small Hello World drill to confirm your machine can talk to GitHub end to end.
A. Create a Test Folder
mkdir skill-wanderer-test
cd skill-wanderer-test
B. Initialize and Create a File
git init
echo "Hello Skill-Wanderer" > test.txt
C. The First Snapshot (The Git Test)
git add .
git commit -m "Testing my setup"
D. Push to the Cloud (The GitHub CLI Test)
This is where we confirm gh auth login actually worked:
gh repo create skill-wanderer-test --public --source=. --remote=origin --pushE. The Result
If everything is successful, you will see a link like https://github.com/your-username/skill-wanderer-test.
Open that link in your browser. If you see your test.txt file there, your laboratory is fully operational.
- If you get an authentication error, re-run
gh auth login. - If the repo appears successfully, you are ready for the rest of the Git course.
8. Troubleshooting Blank-Slate Issues
| Error Message | Meaning | Fix |
|---|---|---|
'git' is not recognized... | Git is not in your computer's PATH. | Restart your terminal or Git Bash. If that fails, re-install Git and ensure PATH integration is enabled. |
Permission denied (publickey) | SSH or authentication issue. | Use HTTPS during gh auth login for the easiest beginner setup. |
Author identity unknown | Git does not know who is saving the code. | Go back to Step 6 and run the two git config --global commands. |
Key Takeaways
- Git is the local engine; GitHub CLI is the professional bridge to GitHub.
- Installation is not complete until both
git --versionandgh --versionwork. gh auth loginis the critical step that connects your machine to GitHub.- The final repo-creation drill proves your environment works in a real workflow, not just in theory.